Zesta Grande on Lady Grey B&W film

I’m very late on posting this, but I developed the second roll of film I took at Zesta Grande. My post about the first roll I took can be read HERE. I guess I took so long to write about this because I am a little disappointed with how they turned out. I mentioned an issue I discovered with that camera in my original post about Zesta:

Another issue was some of the subjects closer to me turned out blurry but everything in the background came out sharp! That was a bummer because I missed the chance to take some really neat pictures. But now I am aware this camera does that and can be mindful in the future. Maybe there is a way to prevent this from happening and I need to explore the features of this camera a little more, but the camera is pretty simple, and I don’t know what adjustments could be made.

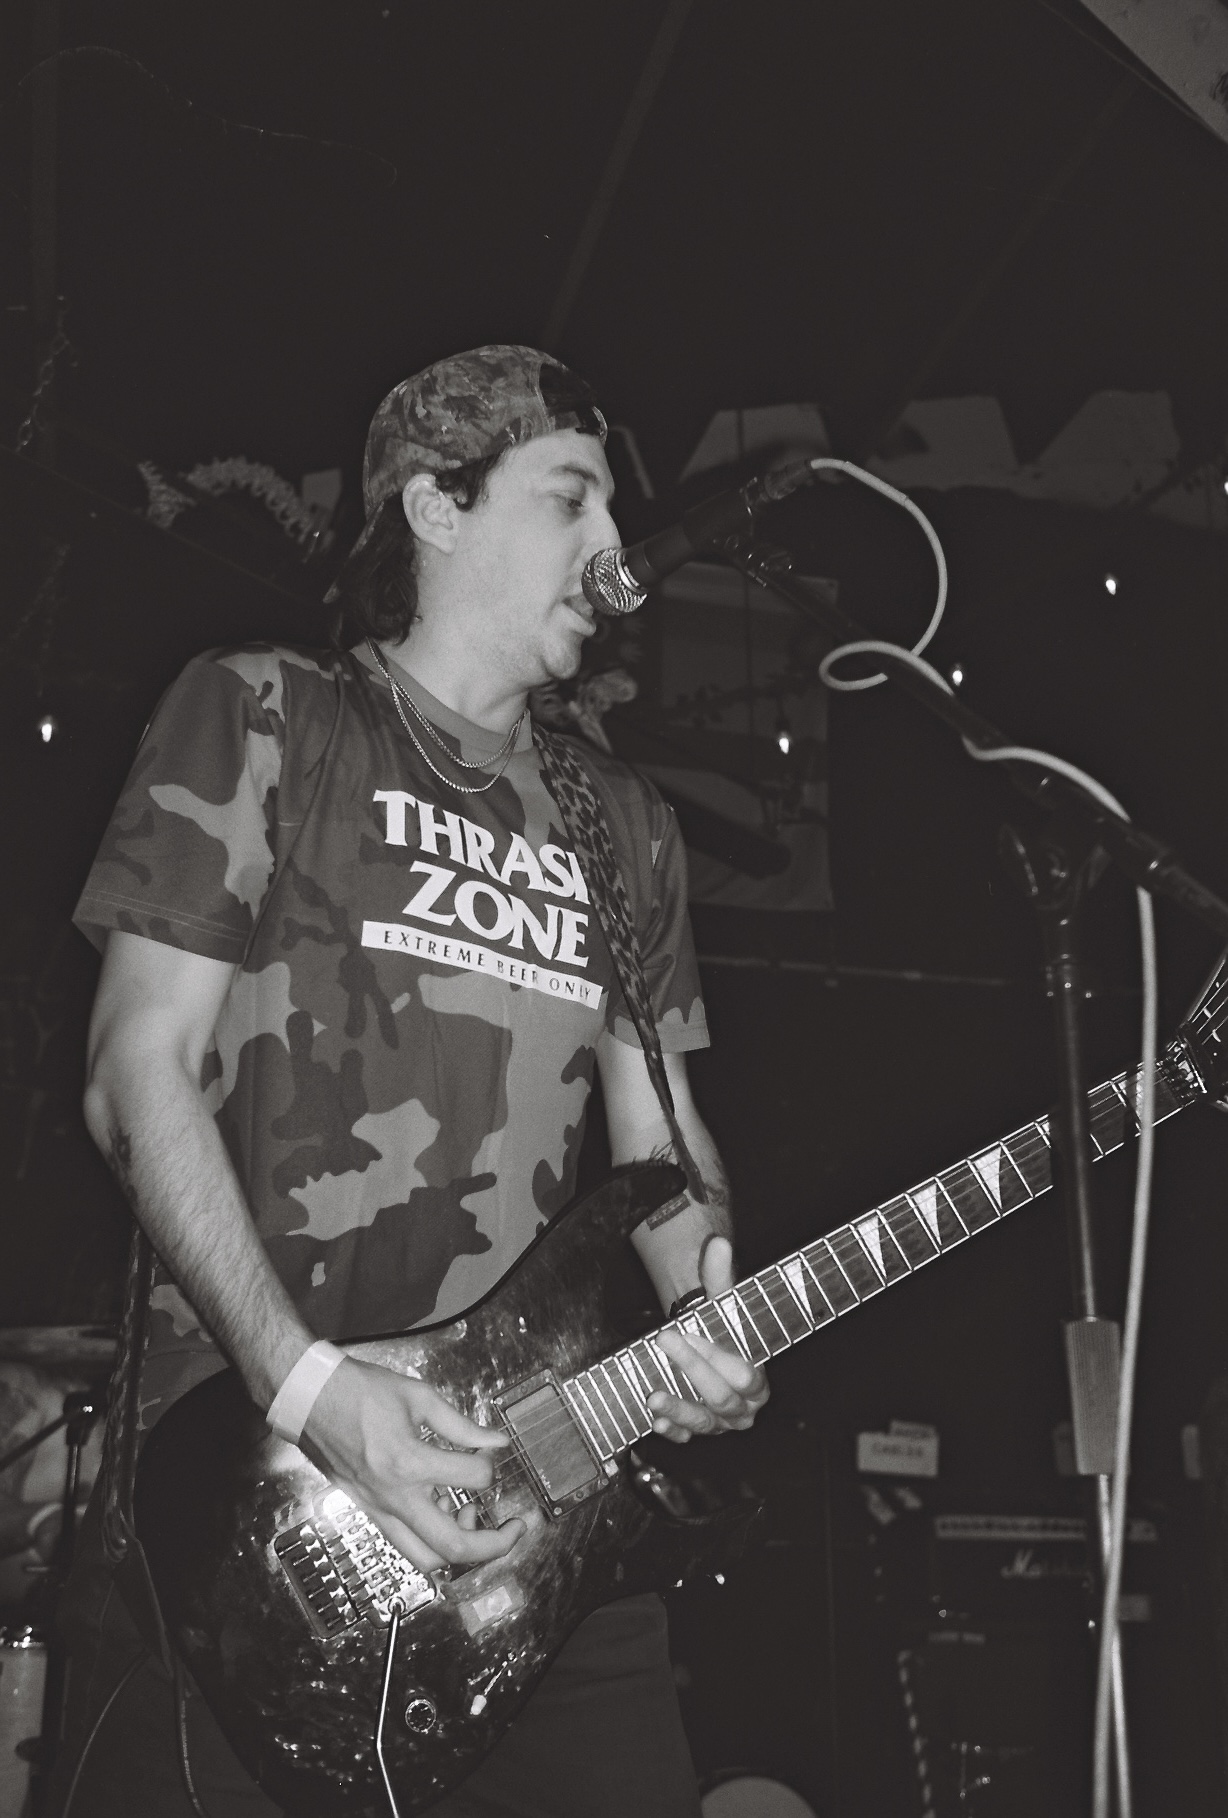
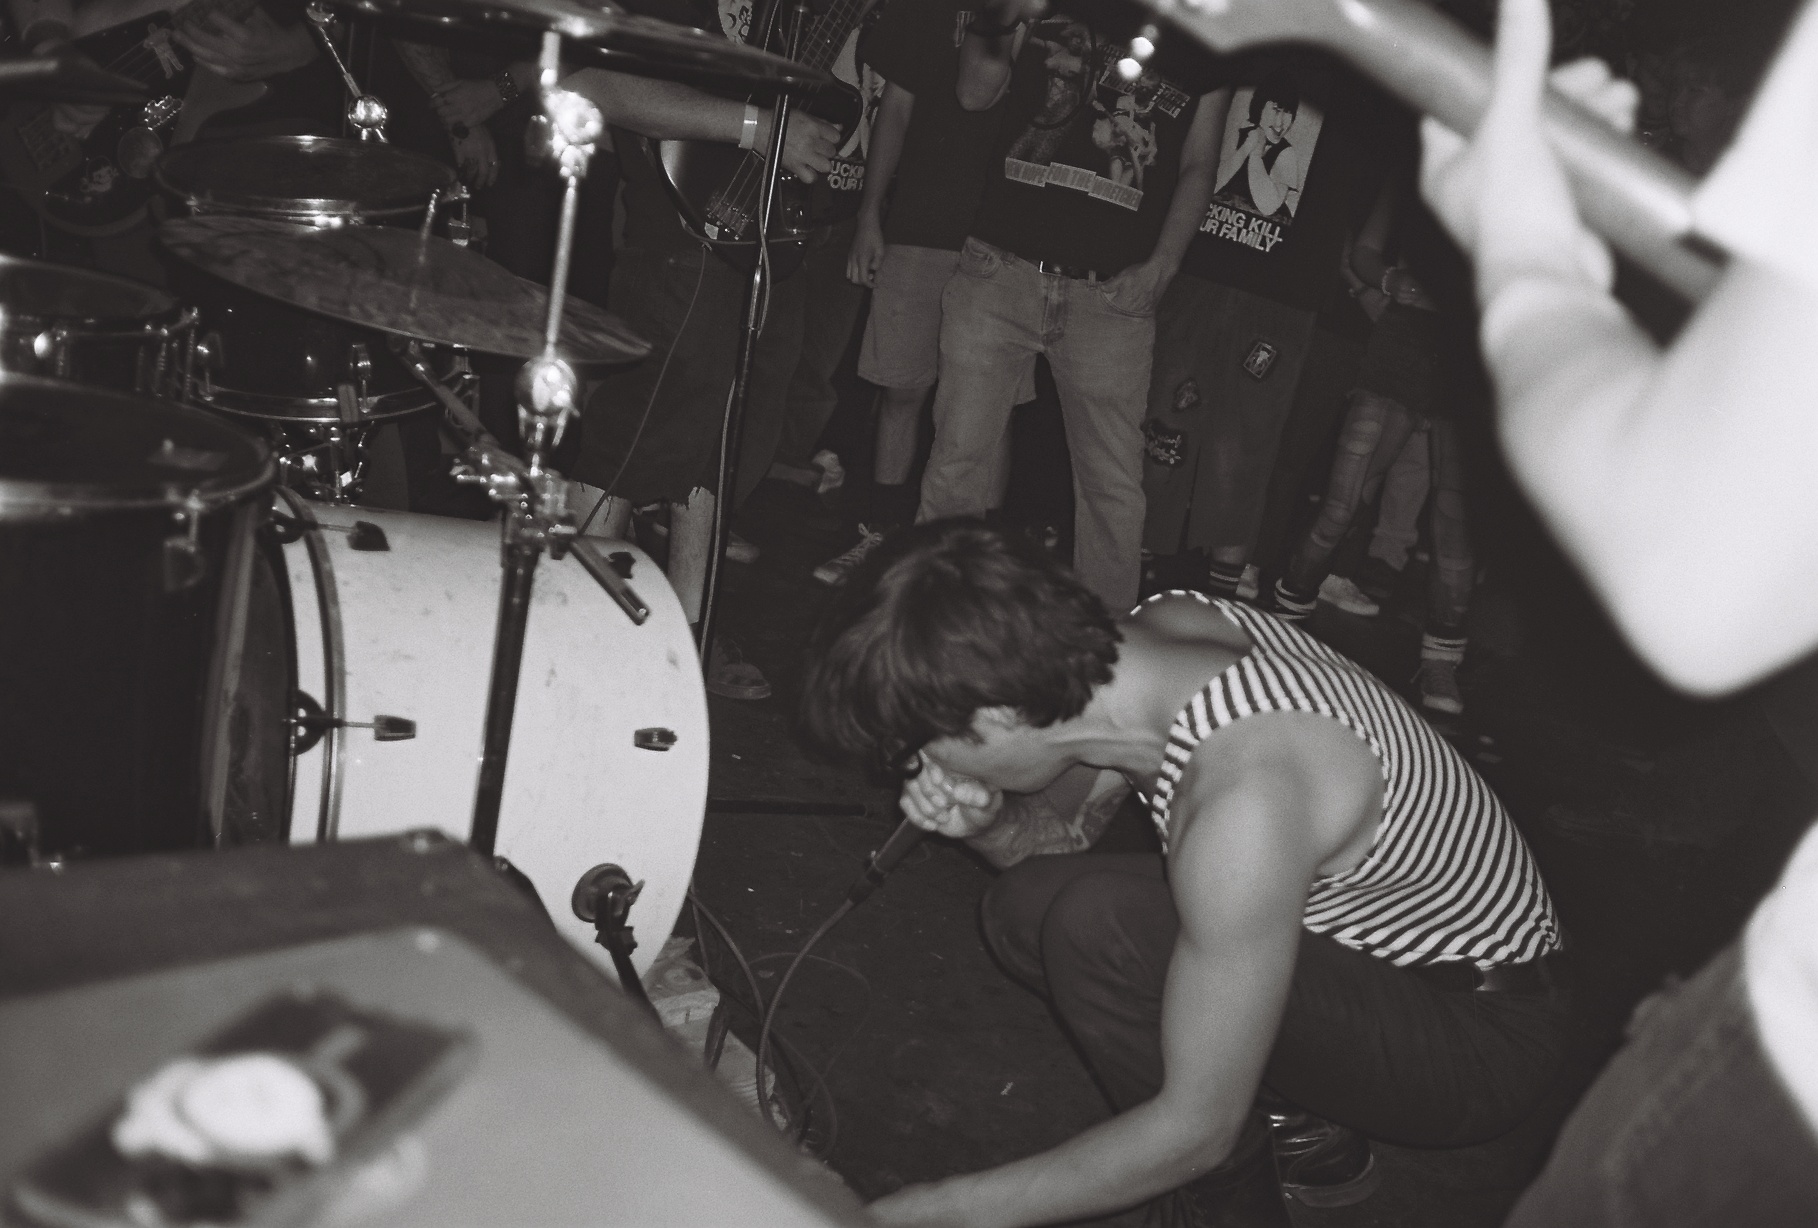
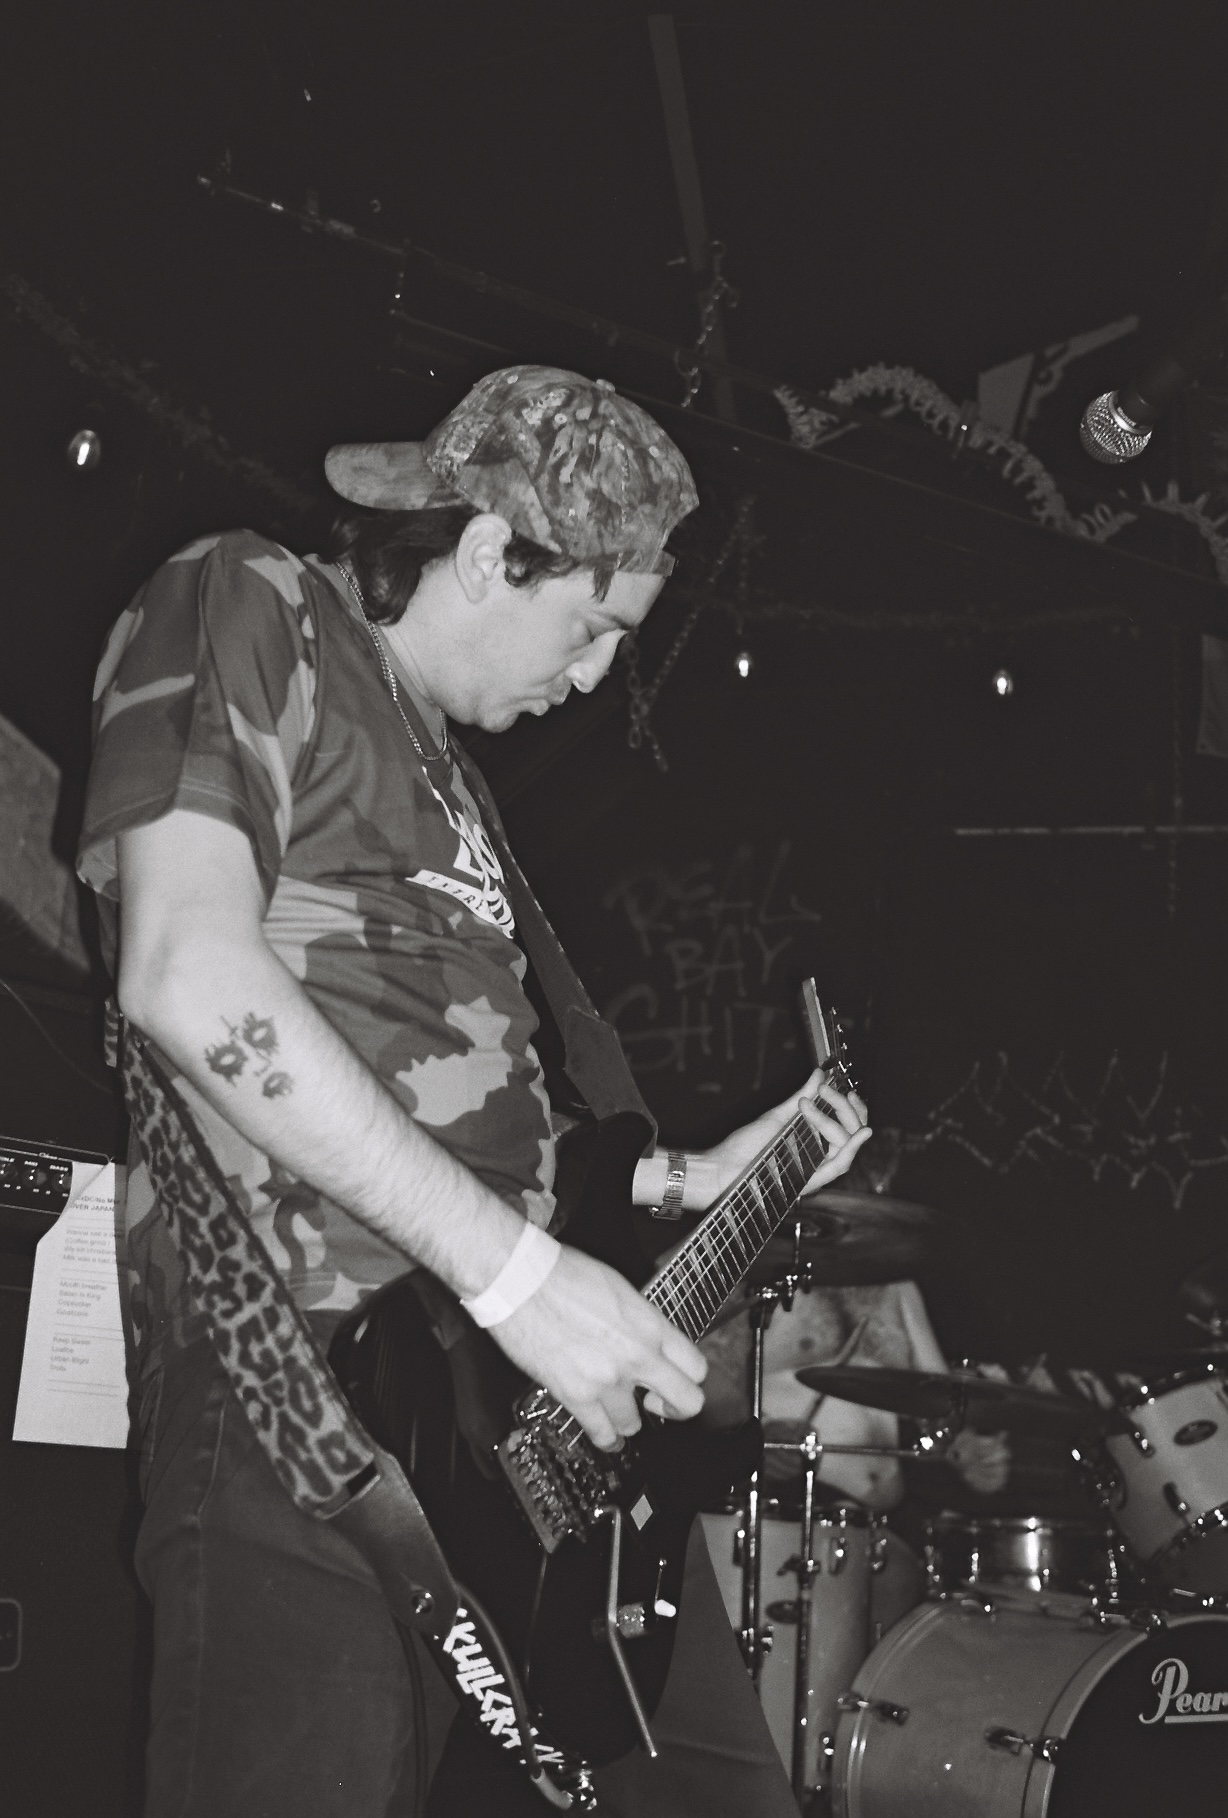
The same issue happed with this roll. There were a few that turned out decent, like these of ACxDC and HKFY:

The other pictures from this roll that turned out okay are in my gallery now; I added them to my Zesta Grande folder. You can see them HERE.

The Lady Grey film was expired, by the way. I let the rolls sit there for a little too long!

There is one photo, in particular, that sums up the camera issue:

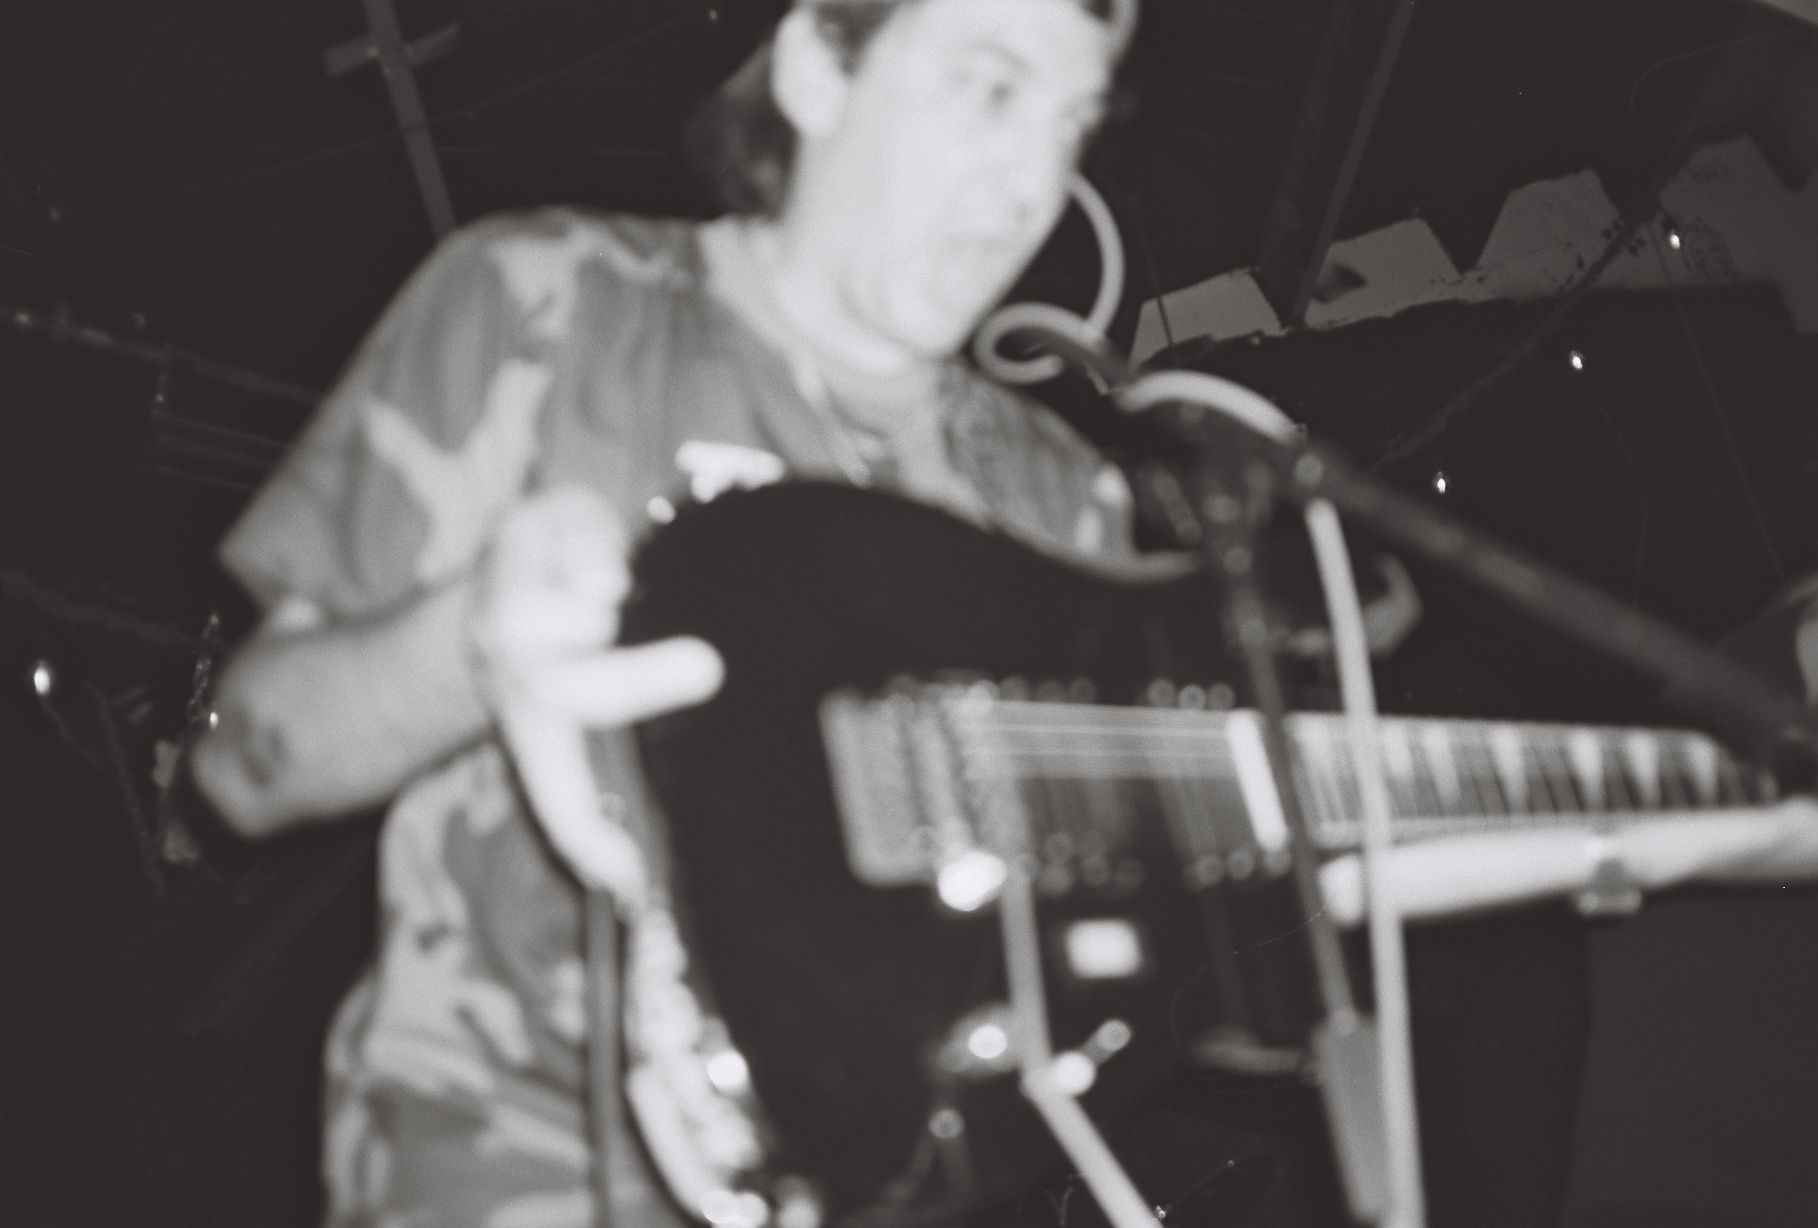
It would have been great if this had turned out well! Tongue out and rubbing the strings on the mic stand, but it’s blurry and the background it sharp! Boo!

There is a third roll of film that I took to Zesta Grande, but I didn’t finish the roll there. I recently finished it off at another show. I am concerned many of the photos may be blurry.

I had a little conversation with another person who enjoys film cameras, and he happened to bring up having a similar film camera that sometimes produces blurry subjects and sharp backgrounds! It really sucks because film and developing isn’t cheap and missing good shots isn’t fun; it would be nice to find a way to use the film cameras and avoid this issue. Maybe I can find more info online. If not, I may avoid using this film camera.

Oh, by the way, the camera is a OLYMPUS Stylus Epic DLX.

I really like the freedom of a small, lightweight camera that I can fit in my Fanny pack.

Anyways, this is all for now. Thanks for reading! If you haven’t already, you can subscribe to my website and get updates via email when I post.

Zesta Grande on Fujifilm 400

I went to Zesta Grande at 924 Gilman on Sunday. I brought an Olympus Stylus Epic DLX camera I had never used before and a few rolls of film. The first one I started with was a roll of FujiFilm 400. I was a bit nervous because I had never used the camera and unsure if it would function normally. I read good reviews, so I had high hopes. First off, I want to mention I had a great time at the show! Killer bands and everything ran smoothly. I had also not been to that venue in ages! And it was wonderful to bring such a light camera that fit right into my fanny pack! I usually bring my big Canon with external flash, and it always makes my hand ache. The convenience of the little film camera was a game changer, for sure!

I dropped the roll Fujifilm 400 off at Mike’s Camera yesterday. I also dropped of a B&W roll of Lady Grey, but I was told they are backed up on B&W developing and it could take up to two weeks. I do want to rant at how pricey it is to develop film and get them scanned! $19.99 per roll! I really need to be developing myself again, but I will save that discussion for another day.

I was thrilled when I got the email today that my photos from the Fujifilm 400 scans were ready to download. Overall, I am very pleased with the outcome! Here are four of my top picks:

(Bands: Endless Swarm, Crohns, Human Obliteration)

I like the composition, nothing is blurry, everything looks fine. There are a few others that turned out nice, as well.

Unfortunately, there are some that could have been better. I was a little late hitting the shutter on some of them! This resulted in faces covered by the microphone, or heads turned, and I didn’t get the greatest shots. I noticed there is a very tiny delay when pressing the shutter. I’m not sure if that is the way the camera is meant to be or if it’s a defect because it’s old. Either way, I missed a few good shots due to changes in position made in just a fraction of time.

Another issue was some of the subjects closer to me turned out blurry but everything in the background came out sharp! That was a bummer because I missed the chance to take some really neat pictures. But now I am aware this camera does that and can be mindful in the future. Maybe there is a way to prevent this from happening and I need to explore the features of this camera a little more, but the camera is pretty simple, and I don’t know what adjustments could be made.

I added all the photos to my gallery:

[CLICK HERE]

If you click on each picture it will show the band name and you can also save the pictures.

I’ve included all of them so everyone can see the little flaws I pointed out. I do love the look and excitement of film, but it’s also challenging because you don’t know what you’re going to get. I can walk away from a show with my digital camera and say, “I know I got some good ones”, but it’s a surprise with film. Gotta hope for the best!

I’ll share my next roll of film when it’s ready!

Olympus Stylus Epic DLX

Giving this camera a try tomorrow!

I haven’t used it before so this should be interesting! I couldn’t find the official manual online but did find some videos on YouTube.

I’m going to the early Zesta Grande tomorrow. I know there will be Bay Area photographers there, so I feel like leaving my heavy digital camera home and bringing this compact little thing!

I have a roll of FujiFilm 400 and two rolls of Lomography Lady Grey 400. Excited!!

It’s wild to think about how long it’s been since I’ve last been to 984 Gilman Street and how rarely I go to out of town shows, in general. I really don’t enjoy driving far distances at night anymore. I need glasses and I am pretty sure I have astigmatism. But the show I’m going to ends at 6pm so I should be safe. It will be nice to have a change of scenery..

Kodak Gold 200

I got a roll of film developed!

I used an old Keystone Royal 35 camera for this. This camera is kind of hit or miss! Sometimes it has neat light leaks. Sometimes the pictures don’t turn out that well. Here are some from this roll that look quite nice!

Zulu
Zulu
Graffiti off I-5
Graffiti off I-5
22nd and J
(This picture isn’t amazing, but I like how part of the previous image appears here and I like the colors.)

There were some more that turned out decently, but not all of them. I think this camera has issues advancing the film sometimes.

I bought a Fuji 400 when I dropped this roll off and I think I want to use my Canon for that roll.

Film failure

I used a roll of film and it didn’t turn out so well. It was an expired roll of Ilford FP4 Plus 125 Black and White. It expired last Summer. I had it for a few years and never got around to using it. I believe there were a few things that happened that caused these images to fail. 

Film:

I went to the river with a small tripod and my goal was to carefully set everything up to experiment. Not only did I kind of have to pee, but there were people occasionally passing by, and I didn’t want to be seen photographing myself because that feels weird. I would have preferred to have brought someone along to photograph, but it was a spontaneous decision to go there. So I was rushed and definitely not putting the care into it that I should have. Not to mention, I was really wanting to try out the multiple exposure setting and completely forgot! Dammit! So I still have to explore that another day.

So here’s the stupid things I did: 

Instead of shooting in manual mode, I shot in aperture priority mode. Because of lazy reasons. And I didn’t even use the tripod I brought! I set the camera on the damn ground! I barely took the time to verify things were focused. I’m so terrible. I kinda wanted to get it done and over with so no one would see me. I would have been so much more relaxed if someone was there with me and also if I didn’t have to pee. I believe I also lost enthusiasm because it’s hard to photograph film when you’re not behind the camera and can see how things look. It takes more patience than I had at that time.

I did take some rather nice pictures on my cell phone just to make sure I had something good to keep from my visit there if my film images were a fail. And they were!!

Processing the film:

The chemicals I used were new. I haven’t developed anything in quite a while and forgot how long I used to leave the negatives in the developer. I took a guess and did it for 4 minutes. I should have done some reading to refresh my memory on everything, but I did not. I remember when I used to develop film before and got pretty causal about it and the images still looked fine, but I should have still refreshed my memory. I could see images on the negatives before I hung them out to dry, so at least there was that. 

I busted out with my lousy, cheap Jumbl scanner, scanned the negatives, and was disturbed by how terrible they came out! Overexposed and super grainy! Ugh! They look like something someone created on their cheap cell phone, changed to black and white, and constrated the shit out of it for bottom-of-the-barrel black metal aesthetic. This was a fail.

I need to revisit some film processing knowledge, get a better scanner, and stop expecting good results if I am going to rush myself and not put real effort into things. I’ll have to revisit the 35mm self timer experiment when I have a lot more time on my hands.

Developing Color Film

If you read my last post, you will have read that I decided to develop film at home and purchased chemicals to develop black & white, although I did use it to develop C41 film, which is color. But I wanted to try my hand at developing color! None of the (two) local photography shops had a color kit, so I ordered one from Freestyle Photo

I was a bit intimidated because I’ve read developing C41 is a bit more detailed than developing black and white, mostly because the temperature needs to be just so. I was also nervous about mixing the chemicals, although it ended up being easier than I thought!  I messed up when I was mixing the developer, I believe I was supposed to mix it using hot water, but I used cold instead. I was thrown off at the dark, blood-red color of the blix chemicals. I couldn’t wait to try and develop a roll of film, so I popped one into my plastic Vivitar LC 600 camera. The film speed was 200 and it was getting later in the day, so I wasn’t sure I’d have enough light with the camera I was using.

Here are some of the images from that roll. They are very BLUE! And also very dark. I felt a little discouraged with developing color film when I saw this, but then I remembered the roll of film I used was a roll that I found in a used camera bag I purchased at a thrift store! Not only could it have been expired, but who knows what it may have encountered. It could have been left in the sun or heat and that would have done some damage. I did, however, get some compliments when I posted these images on my Instagram. I guess the flawed effect does look kind of neat and mysterious.

I took those images a couple weeks ago and had been wanting to give it another try with a fresh roll of film, just to see if I got the same result or if it would turn out better. So yesterday I grabbed my tripod and went in the back yard for some experimentation. This time I used my Canon EOS 10s so I could adjust the lighting. I developed the film shortly after, trying to be sure everything was at the right temperature.

Click images to see full size.

I am quite pleased with the results! They’re not too dark because I used my Canon, but there is still a slight blue hue. I could easily Photoshop the images to correct that, or even edit them on my phone. But let’s not forget the days when Photoshop wasn’t available and photographers had to learn to get it right when they developed the film. I want to learn how to get it right, so I don’t mind posting less than perfect photos because I want to document progress.

Here is one of the images above edited on my iPhone in two different ways:

I think they look much better this way, but I want to get it right during developing. That will mean more practice!